How to create a company?
The "Company Creation" screen is designed to allow users to enter and save the details required to create and set up a new company in the IntelligentGST and offers a user-friendly interface to create and manage company data. The data entered here will serve as the foundation for the company's identity within the software, affecting various modules like accounting, taxes, and contact information,
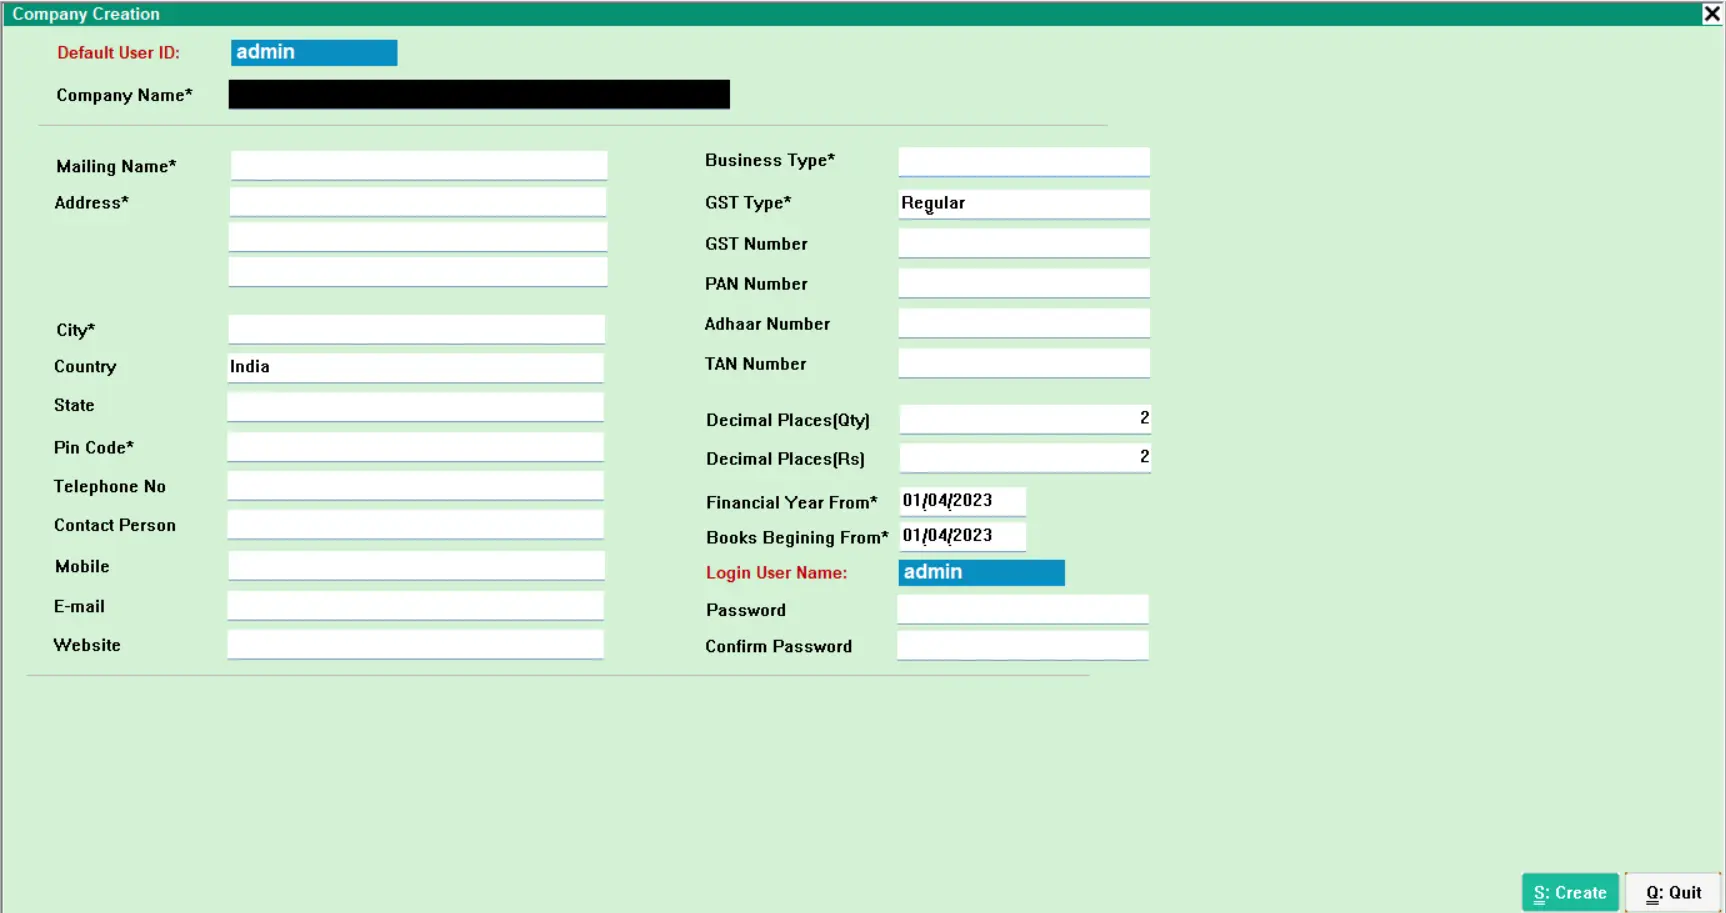
Fields Description
- Default User ID: The default user id is admin. If you enable User Controls in Intelligent you can edit the admin user, and create new users with specific rights on different modules.
- Company Name*: Enter the name of the company as you want to be recognized in the Intelligent software.
- Mailing Name*: Input the name that should appear on correspondence and mailings, if different from the Company Name. Enter the legal or registered name of the company under Goods and Services tax.
- Address*: Provide the full address of the company, including street address, building number, or suite.
- City*: Enter the city where the company is located.
- Country: This field should reflect the country in which the company operates. In this case, it is pre-filled as India.
- State: Specify the state within the country where the company is registered or located.
- Pin Code*: Enter the postal code for the company's location.
- Telephone No: Provide the primary telephone number for the company.
- Contact Person: Name the primary contact for the business, likely someone who manages external inquiries.
- Mobile: Enter the mobile phone number for the company or the primary contact person.
- E-mail: Input the primary email address for the company.
- Website: If applicable, enter the company's website URL.
- Business Type*: Select the nature of the company's business from the dropdown options.
- GST Type*: Choose the type of GST (Goods and Services Tax) registration the company has, such as Regular or Composition.
- GST Number: Provide the company's GSTIN (Goods and Services Tax Identification Number).
- PAN Number: Enter the company's PAN (Permanent Account Number) as issued by the Income Tax Department.
- Aadhaar Number: Input the Aadhaar number if it is associated with the business.
- TAN Number: Enter the Tax Deduction and Collection Account Number, if applicable.
- Decimal Places(Qty): Specify the number of decimal places to be considered for quantity calculations in the system.
- Decimal Places[Rs]: Define the number of decimal places for currency (Rupees in this case) calculations.
- Financial Year From*: Enter the start date of the company's financial year.
- Books Beginning From*: Indicate the date the company's accounting books will start.
- Password: Choose a strong and secure password for the company's login.
- Confirm Password: Re-enter the password for confirmation purposes.
Fields with an asterisk (*) are mandatory and must be filled in to proceed.
- Create (S): Once all the necessary information has been entered, click this button to create the company's profile in the system. Or Press Ctl+S to save
- Quit (Q): If you need to exit the company creation process without saving, click this button.
- Ensure all mandatory fields are filled accurately to avoid issues with company setup.
- The "Financial Year From" and "Books Beginning From" dates should reflect the company's fiscal policies and be aligned with legal requirements.
- Maintain the confidentiality of the login credentials, and do not share them outside of authorised personnel.
- After creating the company profile, review the information for accuracy. Any errors might affect financial and tax reporting.
 9330050004